Unreal’s Rendering Passes
In this chapter you’ll learn about:
- What is a rendering pass
- Over 20 kinds of passes in Unreal – lighting, the base pass or the mysterious HZB
- What affects their cost (as seen in the GPU Visualizer)
- How to optimize each rendering pass
Video
If you prefer a video version of this lesson, you can watch it on YouTube. Still, please verify the information by reading this chapter, as it contains some important errata.
Note: Every chapter of this book is extended compared with the original video. It’s also regularly updated, while videos stay unchanged since their upload.
What is a rendering pass
Let’s begin with explaining what do we call a pass in the rendering pipeline. A pass is a set of draw calls executed on the GPU. They are grouped together by the function they have in the pipeline, like rendering transparent meshes or doing post processing. This organization is done for convenience and to ensure proper order of execution – as some passes may need the output of a particular previous pass.
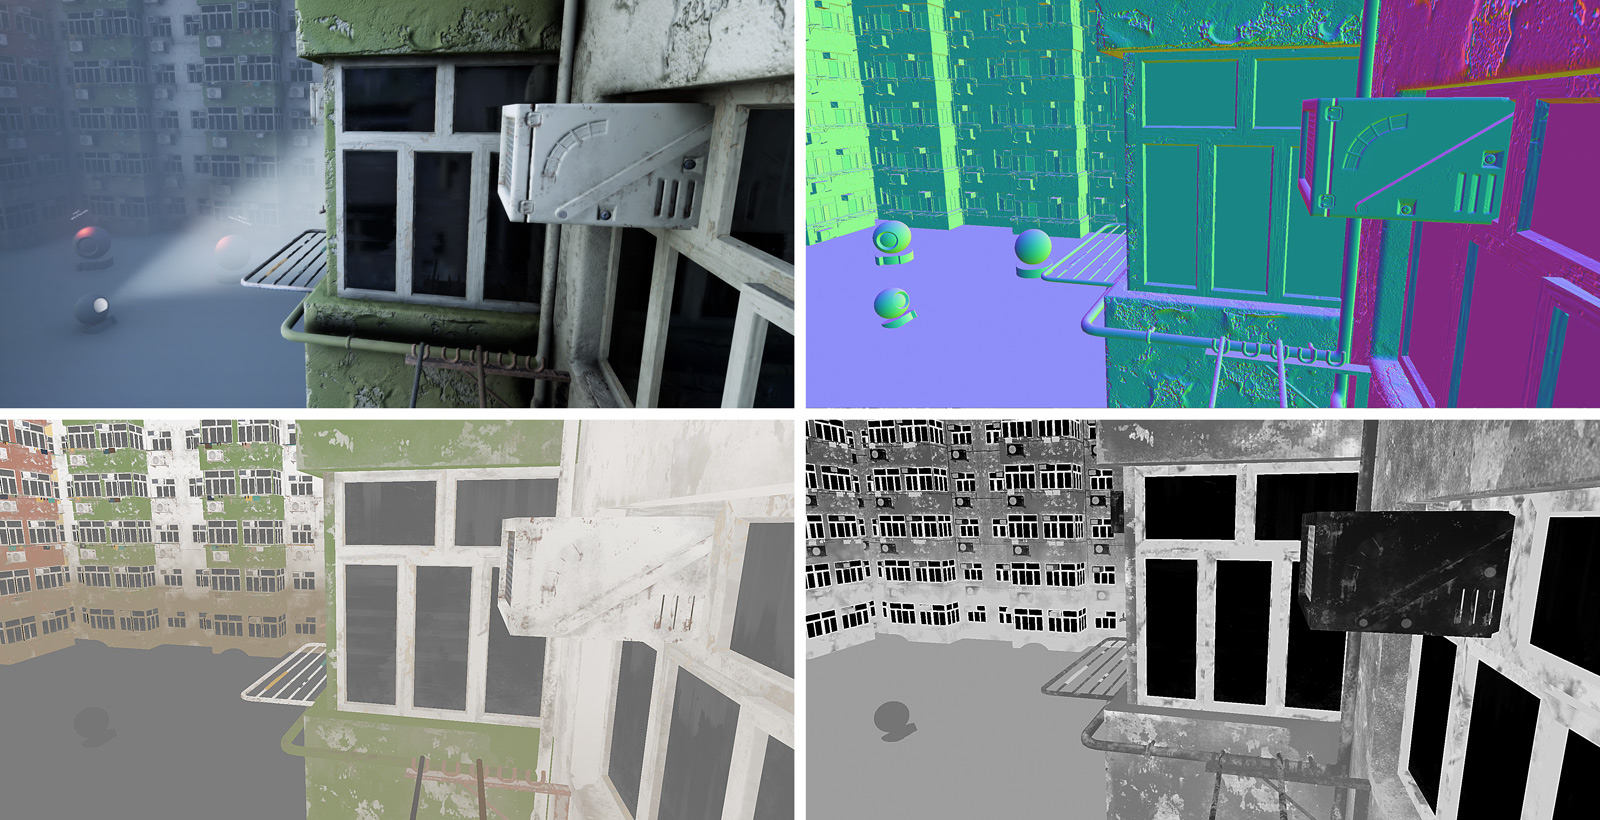
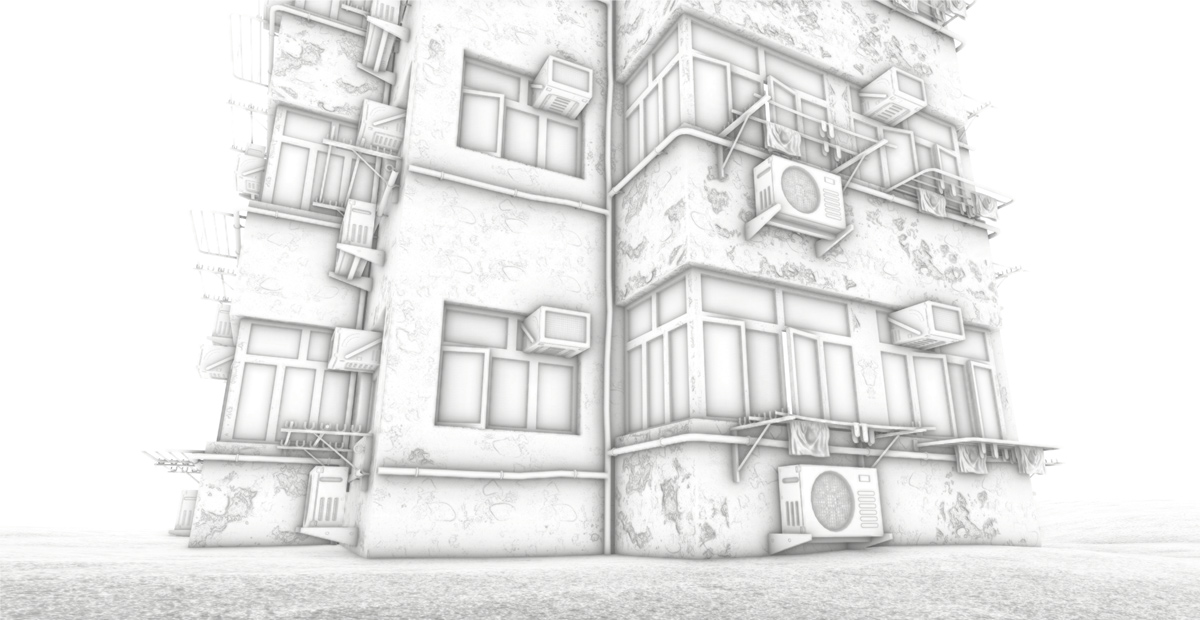
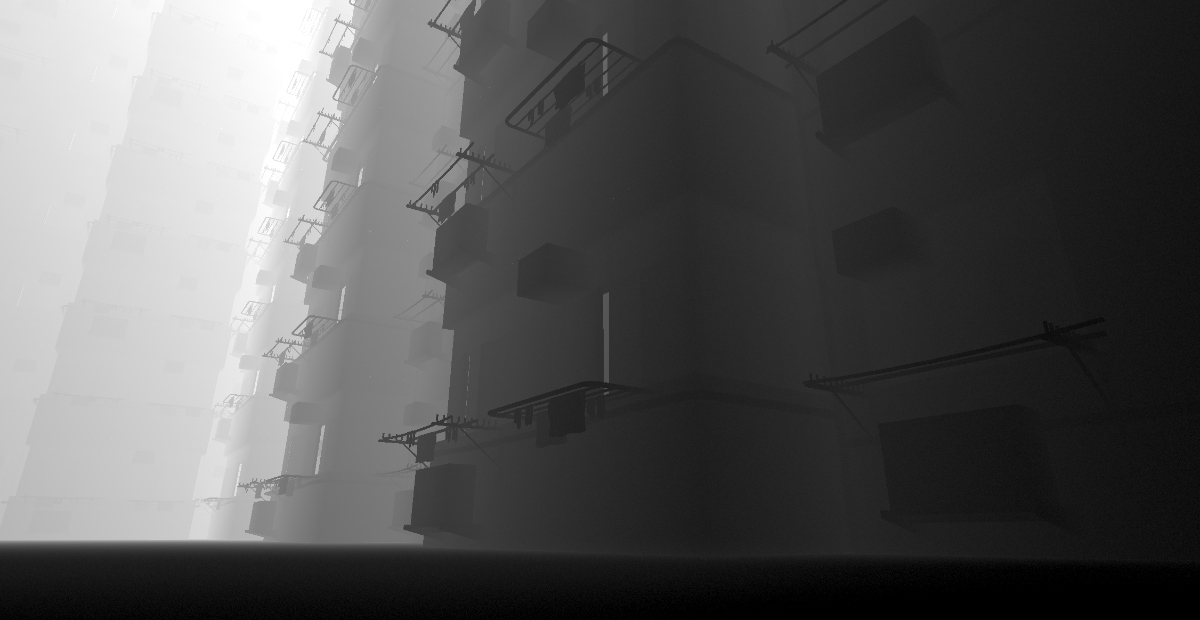
Passes render meshes. This can mean 3D models in your scene or even just a single full-screen quad, as is the case with post processing. The output of most passes looks a bit strange when you extract it. That’s because the color represents data, like a pixel normal direction. Depth calculation or shadow projection don’t look like your familiar textures too. Actually, only the base pass and translucency use the full materials we set up in the editor. Most other passes perform their tasks without them, using their own specialized shaders instead.
If you want to dive deep into the inner workings of Unreal’s pipeline, I recommend reading “How Unreal Renders a Frame” by Kostas Anagnostou.
Cost of a pass
To intuitively understand what can affect the cost of a pass, it’s useful to look at its inputs and its output.
A huge complexity of fragment (pixel) shaders used by a pass, combined with a big number of pixels to process, makes the cost of the pass pixel-bound. The total polygon count of meshes it works on decides if the pass is geometry-bound. There’s also a dependency on memory amount and bandwith.
The base pass is an example of a pass affected by all three factors. It takes visible 3D models (geometry) and renders them with full materials (pixel count), including textures (memory). Then it writes the final information into a resolution-dependent G-Buffer (so it’s memory bandwith again).
If some passes take in just the G-Buffer, but not any 3D meshes - like post process effects do - then obviously they will be only pixel-bound. An increase in game’s rendering resolution will directly affect their cost. On the other hand, it means that the changes in the amount of 3D meshes mean nothing to post process passes. For example, Unreal’s ambient occlusion is a post process operation. It uses the hierarhical Z-buffer and some content from the G-Buffer, for example normals. By understanding what this pass requires, we know where to look for optimization opportunities – in AO’s settings and resolution adjustments, not in the scene’s content.
Guide to passes and categories
The major part of this chapter is a guide to every significant rendering pass in Unreal. You don’t have to read the entire thing. Treat it more as a handbook, which you use to understand the output of the “Stat GPU” command or with GPU Visualizer. Both of them show you the cost of each rendering pass. This allows you to precisely locate issues in a scene, like too many shadowed lights or too many translucent materials.
Much of this information was gathered by reading the engine’s source code and from practical tests. Be aware of potential mistakes here. Sources are provided in the footnotes, so you can fact-check it yourself.
Every pass’ description is laid out in the following format:
- Responsible for …
- Cost affected by …
- Role of the pass
- Optimization advice
Some passes are much more important or customizable than others. Many of them react to changes in the scene, while others – most notably post processes – stay dependent on the resolution only. That’s why the amount of information dedicated to each category varies greatly.
Passes: Table of contents
Base pass
Responsible for:
- Rendering final attributes of Opaque or Masked materials to the G-Buffer
- Reading static lighting and saving it to the G-Buffer
- Applying DBuffer decals
- Applying fog
- Calculating final velocity (from packed 3D velocity)
- In forward renderer: dynamic lighting
Cost affected by:
- Rendering resolution
- Shader complexity
- Number of objects
- Number of decals
- Triangle count
The base pass renders material properties, i.e. the output of node networks made in the Material Editor. In the default, deferred rendering mode, it saves the properties – base color, roughness, world-space normal etc. – into the G-Buffer (a set of full-screen textures). Then it leaves the lighting calculation for another pass. This material data is also used later by various other passes, most notably by screen-space techniques: dynamic reflections and ambient occlusion.
But that’s just a part of this pass’ responsibilities. It reads static lighting – from lightmaps, indirect lighting caches – and applies it, by blending it immediately with material’s color.
In the forward rendering mode, the base pass also calculates dynamic lighting and immediately mixes it into the color. Therefore, in foward, it takes over all responsibilities of the lighting passes.
The base pass also applies DBuffer decals. The decals in view are projected onto objects, their shaders are run and the results blended with the contents of the G-Buffer. Fog is also mixed in during this pass.
Base pass optimization
Shader complexity is obviously the most important factor here. You can check it roughly using the Shader Complexity view mode. It’s also useful to look at the number displayed in the Stats window in Material Editor – just be sure to check this number after you press Apply. The “good” value of shader instructions depends on the rendering resolution of your game and the area covered by the material on screen. To test how much the performance is affected by a shader, replace it temporarily with a basic material and compare miliseconds spent in the base pass.
Watch out for memory bandwith. Textures used by materials, as well as lightmaps, need to be read every frame. Even if you re-use textures a lot (which is a good thing), it only helps to save on the GPU memory and on reading from the CPU RAM. The data still needs to be transferred to the local cache and then to shader cores. A dedicated chapter explains the memory-related costs.
Increasing rendering resolution directly affects the weight of the G-Buffer and other full-screen textures. The memory size of the G-Buffer can be read with the command stat RHI. You can temporarily scale the rendering resolution with r.ScreenPercentage XX, e.g. 20 or 150. This will allow you to see how much additional VRAM is needed for a given resolution.
Decals are an oft-overlooked source of trouble. This pass can take a serious hit when there are too many decals in view. Keep their material complexity low as well, though this is rarely an issue with decals.
The costs (and optimization advice) which you’ll normally see in Lights passes apply here instead when using forward rendering. In addition to the general rules, keep light overlap (aka overdraw) in check. Forward renderers are genetically allergic to multiple lights hitting the same object.
Geometry
PrePass
Responsible for:
- Early rendering of depth (Z) from non-translucent meshes
Cost affected by:
- Triangle count of meshes with Opaque materials
- Depending on Early Z setting: Triangle count and complexity of Masked materials
Description TODO. Its results are required by DBuffer decals. The pre-pass may also be used by occlusion culling.
PrePass optimization
This pass is influenced by the choice in Engine → Rendering → Optimizations → Early Z-pass.
HZB (Setup Mips)
Responsible for:
- Generating the Hierarchical Z-Buffer
Cost affected by:
- Rendering resolution
The HZB is used by an occlusion culling method1 and by screen-space techniques for ambient occlusion and reflections2.
Warning: Time may be extreme in editor, but don’t worry. It’s usually a false alarm, due to an bug in Unreal. Just check the value in an actual build. The bug is hopefully fixed since UE 4.183.
ParticleSimulation, ParticleInjection
Responsible for:
- Particle simulation on the GPU (only of GPU Sprites particle type)
Cost affected by:
- Number of particles spawned by GPU Sprites emitters
- Collision (Scene Depth) module

If you enabled GPU Sprites in a particle emitter, then their physics simulation is done here. The cost depends on the number of particles spawned by such emitters. Enabling the Collision module increases the complexity of the simulation. The collision of GPU sprites with the rest of the scene is tested against screen-space data (for example the Z-depth). This makes it faster than the traditional, CPU-based collision of particles against actual 3D meshes. Still, it’s not entirely free – and the cost is moved to the GPU.
Particle passes optimization
The bigger the number of particles that have to be simulated (especially collide), the bigger the cost. Remember that you can use particle level of detail (LOD) to limit the number of particles being spawned. You may get away with much smaller numbers if the emitter is viewed from far distance.
RenderVelocities
Responsible for:
- Saving velocity of each vertex (used later by motion blur and temporal anti-aliasing)
Cost affected by:
- Number of moving objects
- Triangle count of moving objects
Measures the velocity of every moving vertex and saves it into the motion blur velocity buffer.
Lighting
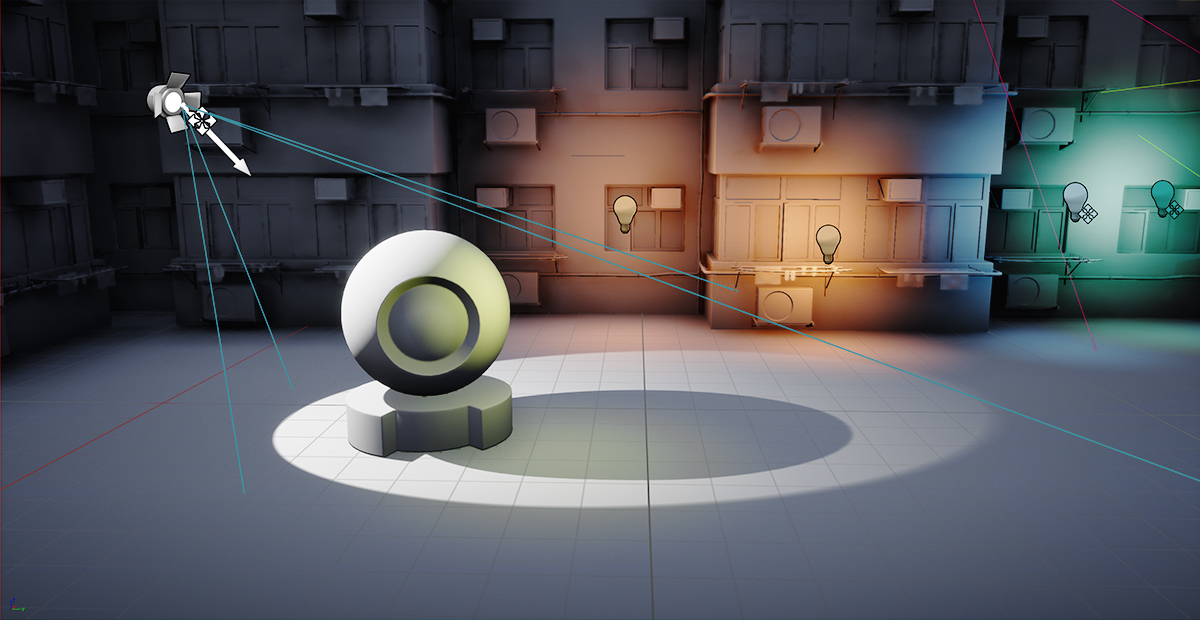
Lighting can often be the heaviest part of the frame. This is especially likely if your project relies on dynamic, shadowed light sources.
Direct lighting
ComputeLightGrid
Responsible for:
- Optimizing lighting in forward shading
Cost affected by:
- Number of lights
- Number of reflection capture actors
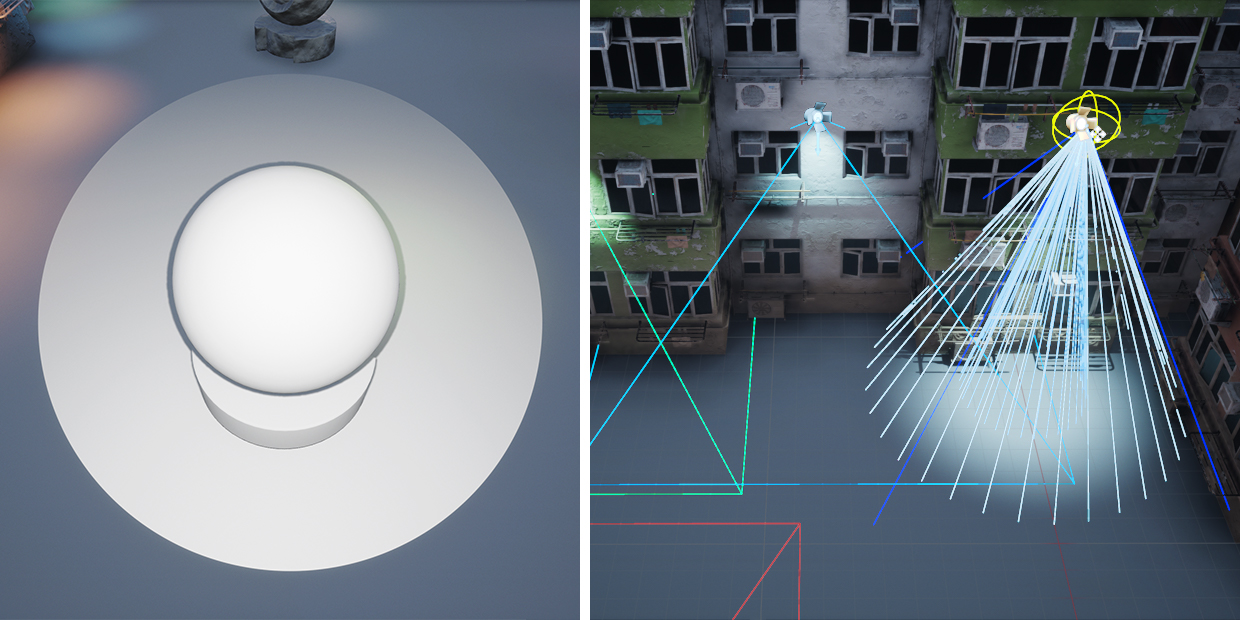
According to the comment in Unreal’s source code4, this pass “culls local lights to a grid in frustum space”. In other words: it assigns lights to cells in a grid (shaped like a pyramid along camera view). This operation has a cost of its own but it pays off later, making it faster to determine which lights affect which meshes5.
Lights → NonShadowedLights
Responsible for:
- Lights in deferred rendering that don’t cast shadows
Cost affected by:
- Rendering resolution
- Number of movable and stationary lights
- Radius of lights
This pass renders lighting for the deferred shading – the default method by which Unreal handles lights and materials. Please read how it works – and how is it different from the other mode, forward rendering – in the relevant chapter.
NonShadowedLights optimization
To control the cost of non-shadowed lights, use each light’s Attenuation Distance and keep their total number in check. The time it takes to calculate all lighting can be simply derived from the number of pixels affected by each light. Occluded areas (as well as off-screen) do not count, as they’re not visible to the camera. When lights’ radii overlap, some pixels will be processed more than once. It’s called overdraw and can be visualized in the viewport with Optimization Viewmodes → Light Complexity.
Static lights don’t count to the overdraw, because they’re stored as precomputed (aka baked) lightmaps. They are not considered being “lights” anymore. If you’re using baked lighting in your project (and most probably you do), set the mobility of all lights to Static, except for some most important ones.
Shadows
Lights → ShadowedLights
Responsible for:
- Lights that cast dynamic shadows
Cost affected by:
- Rendering resolution
- Number of movable and stationary lights
- Radius of lights
- Triangle count of shadow-casting meshes
Description TODO.
ShadowDepths
Responsible for:
- Generating depth maps for shadow-casting lights
Cost affected by:
- Number and range of shadow-casting lights
- Number and triangle count of movable shadow-casting meshes
- Shadow quality settings
ShadowDepths pass generates depth information for shadow-casting lights. It’s like rendering the scene’s depth from each light’s point of view. The result is a texture, aka depth map.6
Then the engine calculates the distance of each pixel to the light source from the camera point of view – but still in light’s coordinate space. By comparing this value with the depth map, during the ShadowProjection pass, it can test whether a pixel is lit by the given light or is in shadow.
The cost of it is mostly affected by the number and the range of shadow-casting lights. What also matters is the number and triangle count of movable shadow-casting objects. Depending on the combination, you can have static meshes and static lights – then the cost is zero, because static lights are just textures: they’re precomputed. But you can also have, for example, stationary or movable lights and static or movable objects in their range. Both of these combinations require the engine to generate shadows from such meshes, separately for each light.
ShadowDepths optimization
Shadows are usually one of the most heavy parts of rendering, if care is not taken. The easiest way to control their performance hit is to disable shadows for every light source that doesn’t need them. Very often you’ll find that you can get away with the lack of shadows, without the player noticing it, especially for sources that stay far away from the area of player’s movement. It can be also a good workaround to enable shadow-casting just for a single lamp in a bigger group of lights.
For shadowed lights, the biggest factor is the amount of polygons that will have to be rendered into a depth map. Light source’s Attenuation Radius sets the hard limit for the drawing range. Shadowed spot lights are typically less heavy than point lights, because their volume is a cone, not a full sphere. Their additional setting is Outer Cone Angle – the smaller, the better for rendering speed, because probably less object will fall into this lamp’s volume.
Directional light features a multi-resolution method of rendering shadows, called cascaded shadow maps. It’s needed because of the huge area a directional light (usually the sun) has to cover. Epic’s wiki provides tips for using CSMs. The most significant gains come from Dynamic Shadow Distance parameter. The quality in close distance to the camera can be adujsted with Cascade Distribution Exponent, at the expense of farther planes.
To control the resolution of shadows, use sg.ShadowQuality X in the INI files, where X is a number between 0 and 4. High resolution shadows can reduce visible jagging (aliasing), at the cost of rendering, storing and reading back bigger depth maps.
ShadowProjection
Responsible for:
- Final rendering of shadows7
Cost affected by:
- Rendering resolution
- Number and range of shadow-casting lights (movable and stationary)
- Translucency lighting volume resolution
Note: In GPU Visualizer it’s shown per light, in Light category. In stat gpu it’s a separate total number.
Shadow projection is the final rendering of shadows. This process reads the depth map and compares it with the scene, to detect which areas lie in shadow.
ShadowProjection optimization
Unlike ShadowDepths, ShadowProjection’s performance is also dependent on the final rendering resolution of the game. All the advice from other shadow passes applies here as well.
Indirect lighting
LightCompositionTasks_PreLighting
Responsible for:
- Screen-space ambient occlusion
- Decals (non-DBuffer type)
Cost affected by:
- Rendering resolution
- Ambient occlusion radius and fade out distance
- Number of decals (excluding DBuffer decals)
Ambient occlusion is a post process operation (with optional static, precomputed part). It takes the information about the scene from the G-Buffer and the hierarchical Z-Buffer. Thanks to that, it can perform all calculations in screen space, avoiding the need for querying any 3D geometry. However, it’s not listed in the PostProcessing category. Instead, you can find it in LightCompositionTasks. The full names of its sub-passes in the profiler – something similar to AmbientOcclusionPS (2880x1620) Upsample=1 – reveal additional information. The half-resolution (1440x810 Upsample=0) is used for doing all the math, for performance reasons. Then the result is simply upscaled to the full resolution.
The LightCompositionTasks_PreLighting pass has also to work on decals. The greater the number of decals (of standard type, not DBuffer decals), the longer it takes to compute it.
PreLighting optimization
The cost of this pass is mostly affected by the rendering resolution. You can also control ambient occlusion radius and fade out distance. The radius can be overriden by using a Postprocess Volume and changing its settings. Ambient occlusion’s intensity doesn’t have any influence on performance, but the radius does. And in the volume’s Advanced drop-down category you can also set Fade Out Distance, changing its maximum range from the camera. Keeping it short matters for performance of LightCompositionTasks.
CompositionAfterLighting
Responsible for:
- Subsurface scattering (SSS) of Subsurface Profile type.
Cost affected by:
- Rendering resolution
- Screen area covered by materials with SSS
Note: In stat gpu it’s called CompositionPostLighting.
There are two types of subsurface scattering in Unreal’s materials. The older one is a very simple trick of softening the diffuse part of lighting. The newer one, called Subsurface Profile, is much more sophisticated. The time shown in CompositionAfterLighting refers to the latter. This kind of SSS accounts for the thickness of objects using a separate buffer. It comes with a cost of approximating the thickness of geometry in real-time, then of using the buffer in shaders.
CompositionAfterLighting optimization
To reduce the cost, you have to limit the amount of objects using the new SSS and keep their total screen-space area in check. You can also use the fake method or disable SSS in lower levels of detail (LOD).
Translucency and its lighting
Translucency
Responsible for:
- Rendering translucent materials
- Lighting of materials that use Surface ForwardShading.
Cost affected by:
- Rendering resolution
- Total pixel area of translucent polygons
- Overdraw
- If Surface ForwardShading enabled in material: Number and radius of lights
Note: In stat gpu there are only two categories: Translucency and Translucent Lighting. In GPU Visualizer (and in text logs) the work on translucency is split into more fine-grained statistics.
Description TODO. This is basically the base pass for translucent materials. Most of the advice regaring the base pass applies here as well.
Translucent Lighting
Responsible for:
- Creating a global volumetric texture used to simplify lighting of translucent meshes
Cost affected by:
- Translucency lighting volume resolution
- Number of lights with Affect Translucent Lighting enabled
Lighting of translucent objects is not computed directly. Instead, a pyramid-shaped grid is calculated from the view of the camera. It’s done to speed up rendering of lit translucency. This kind of caching makes use of the assumption that translucent materials are usually used for particles, volumetric effects – and as such don’t require precise lighting.
You can see the effect when changing a material’s Blend Mode to Translucent. The object will now have more simplified lighting. Much more simplified, actually, compared to opaque materials. The volumetric cache can be avoided by using a more costly shading mode, Surface ForwardShading.
Translucent lighting optimization
The resolution of the translucent lighting volume can be controlled with r.TranslucencyLightingVolumeDim xx. Reasonable values seem to fit between 16 and 128, with 64 being a default (as of UE 4.17). It can be also disabled entirely with r.TranslucentLightingVolume 0
In GPU Visualizer, the statistic is split into ClearTranslucentVolumeLighting and FilterTranslucentVolume. The latter performs filtering (smoothing out) of volume8, probably to prevent potential aliasing issues. The behavior can be disabled for performance with r.TranslucencyVolumeBlur 0 (default is 1).
You can also exclude individual lights from being rendered into the volume. It’s done by disabling Affect Translucent Lighting setting in light’s properties. The actual cost of a single light can be found in GPU Visualizer’s Light pass, in every light’s drop-down list, under names like InjectNonShadowedTranslucentLighting.
Fog, ExponentialHeightFog
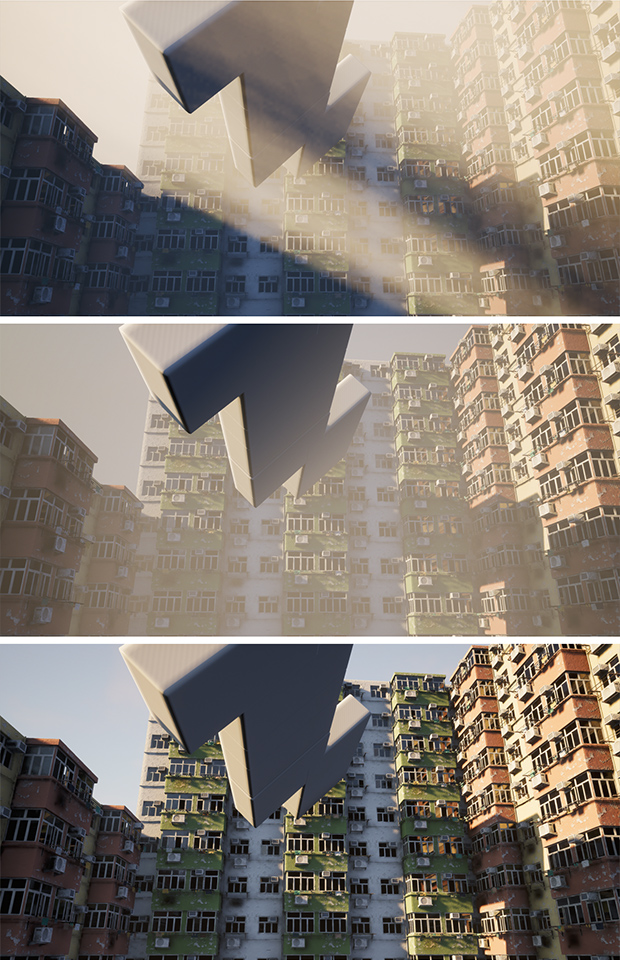
Responsible for:
- Rendering the fog of Exponential Height Fog type9
Cost affected by:
- Rendering resolution
Description TODO.
Reflections

ReflectionEnvironment
Responsible for:
- Reading and blending reflection capture actors’ results into a full-screen reflection buffer
Cost affected by:
- Number and radius of reflection capture actors
- Rendering resolution
Reads reflection maps from Sphere and Box Reflection Capture actors and blends them into a full-screen reflection buffer.
All reflection capture probes are 128x128 pixel images. You can change this dimension in Project Settings. They are stored as a single big array of textures. That’s the reason you can have only 341 such probes loaded in the world at once10.
ScreenSpaceReflections
Responsible for:
- Real-time dynamic reflections
- Done in post process using a screen-space ray tracing technique
Cost affected by:
- Rendering resolution
- Quality settings
Description TODO.
ScreenSpaceReflections optimization
The general quality setting is r.SSR.Quality n, where n is a number between 0 and 4.
Their use can be limited to surfaces having roughness below certain threshold. This helps with performance, because big roughness causes the rays to spread over wider angle, increasing the cost. To set the threshold, use r.SSR.MaxRoughness x, with x being a float number between 0.0 and 1.0.
PostProcessing
Responsible for:
- Depth of Field (BokehDOFRecombine)
- Temporal anti-aliasing (TemporalAA)
- Reading velocity values (VelocityFlatten)
- Motion blur (MotionBlur)
- Auto exposure (PostProcessEyeAdaptation)
- Tone mapping (Tonemapper)
- Upscaling from rendering resolution to display’s resolution (PostProcessUpscale)
Cost affected by:
- Rendering resolution
- Number and quality of post processing features
- Number and complexity of blendables (post process materials)
Description TODO. The final pass in the rendering pipeline, dealing with full-screen effects.
Footnotes
-
Accepted answer to “How does object occlusion and culling work in UE4?”, Tim Hobson, answers.unrealengine.com ↩
-
“Screen Space Reflections in Killing Floor 2”, Sakib Saikia, sakibsaikia.github.io ↩
-
Bug UE-3448HZB, “Setup Mips taking considerable time in GPU Visualizer”, issues.unrealengine.com ↩
-
Unreal Engine source code, DeferredShadingRenderer.h, line 74 ↩
-
Slides from “Practical Clustered Shading”, p. 34, Ola Olsson, Emil Persson, efficientshading.com ↩
-
“Tutorial 16 : Shadow mapping”, OpenGL-Tutorial, http://www.opengl-tutorial.org ↩
-
Unreal Engine source code, TranslucentLightingShaders.usf, line 108 ↩
-
“Limitations”, in “Reflection Environment”, Unreal Engine documentation, docs.unrealengine.com ↩